
We can't find the internet
Attempting to reconnect
Something went wrong!
Hang in there while we get back on track
MCU MIDI COM Universal Multi MIDI Mapper
by
zrgcz
MCU MIDI COM v0.87
Universal MIDI Learn and hardware-control bridge for Renoise
MCU MIDI COM turns a compatible MIDI hardware controller into a configurable control surface for Renoise. It provides dedicated encoder, fader and button pages, three target-mapping banks, universal MIDI Learn, automatic song-based mapping persistence and optional realtime cooperation with HYDRA SANITY.
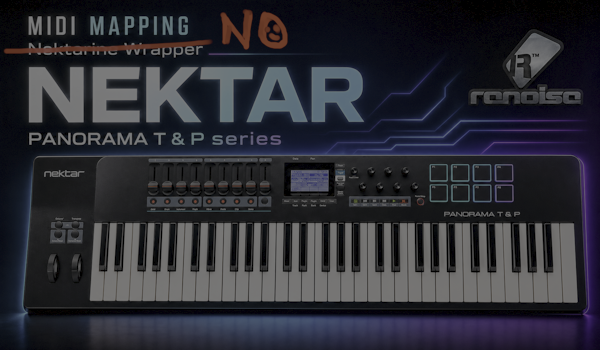
The tool was originally developed for the Nektar Panorama T4 and T6. Its MCU MIXER profile remains optimized for the Panorama MCU layout, but the INTERNAL profile and universal MIDI Learn also allow other MIDI controllers, including Arturia devices, to be used.
The current release was developed and tested with Renoise 3.5.4 and Lua API 6.2.
Quick Start
- Open MCU MIDI COM from the Renoise Tools menu. Opening the GUI also starts the engine.
-
Press
Show MIDI Setupif the MIDI port panel is hidden. -
Select the hardware control input in
P2 CTRL. Select its output as well when MIDI LED feedback is required. -
Choose
MCU MIXERfor a compatible MCU layout, orINTERNALfor a standard MIDI controller that will use MIDI Learn. -
Press
Show MIDI LEARNand learn the required ENC, FAD and BTN slots. -
Select
GUI 4orGUI 8. -
Choose a
Fader Mode, anEncoder Modeand a targetBANK. -
Use
STOP ENGINEbefore closing a completed session. It performs the final silent mapping save.
MCU MIDI COM loads the saved song mapping automatically when the engine starts. Manual SAVE Mapping and LOAD Mapping buttons are no longer required.
1. Introduction
MCU MIDI COM separates physical MIDI hardware from Renoise targets.
The physical layer determines which MIDI message controls ENC1–8, FAD1–9, BTN1–8 and the additional control buttons. The target layer determines which Renoise track, DSP, instrument parameter or action is controlled by each slot.
This separation makes it possible to:
- use one controller with several Renoise target layouts;
- change targets without re-learning the hardware;
-
keep three independent
BANK 1–3configurations; - use either the prepared Panorama MCU layout or a custom MIDI controller;
- connect encoder automation to HYDRA SANITY without giving HYDRA SANITY direct ownership of the same hardware port.
The main control groups are:
| Group | Purpose |
|---|---|
ENC1–8 |
Control Track DSP, Instrument or Master-page parameters. |
FAD1–9 |
Control Renoise Mixer parameters or explicitly selected #DSP parameters. |
BTN1–8 |
Control USER parameters, MUTE, SOLO or HYDRA SANITY ARM states. |
SETUP CONTROLL TOOL |
Learn additional Panorama-style navigation and transport buttons. |
2. Basic MIDI Hardware Setup — Show MIDI Setup
Press Show MIDI Setup to display the three MIDI port roles. The button changes to Hide MIDI Setup while the panel is visible.
MIDI port roles
| GUI port | Intended role | Typical use |
|---|---|---|
P1 PERF |
Performance input | Keyboard, pads, Pitch Bend and Mod Wheel handled through the normal Renoise MIDI input configuration. |
P2 CTRL |
MCU MIDI COM control port | Encoders, faders, buttons, transport messages and MIDI feedback owned directly by MCU MIDI COM. |
P3 BRG |
Optional external bridge |
A separate external MIDI bridge or Nektarine-style connection. Leave it at None when unused. |
The Nektar Panorama exposes several USB MIDI endpoints. MCU MIDI COM supports the Nektar MIDI device/port 1–3 arrangement by keeping performance, controller and bridge traffic in separate roles.
Panorama T4/T6 in MCU MIXER mode
For the prepared Panorama MCU profile:
-
put the Panorama into its physical
MIXER/ MCU-compatible mode; - route the controller endpoint to USB port 2 on the Panorama;
-
select
MIDIIN2 (PANORAMA T4/T6)asP2 CTRLinput; -
select
MIDIOUT2 (PANORAMA T4/T6)asP2 CTRLoutput when button LED feedback is required.
The exact device name can vary slightly with the operating system and driver.
Standard MIDI controller mode
When the connected hardware is used only as a MIDI controller, its control data must be assigned to P2 CTRL.
Example for Arturia:
-
select the Arturia MIDI input as
P2 CTRLinput; -
select the Arturia MIDI output as
P2 CTRLoutput only if the device supports feedback that matches the active mapping; -
press
INTERNAL; -
use
Show MIDI LEARNto assign the Arturia controls to ENC, FAD and BTN slots.
The same procedure applies to other standard MIDI controllers.
P1 PERF is intentionally reserved for Renoise-native performance input. MCU MIDI COM stores the selected P1 name but does not open P1 as a second direct controller input. This avoids mixing note-performance traffic with the control-surface path.
MIDI device selections are stored in the tool preferences. If a device is changed while the engine is running, the corresponding P2 or P3 port is rebound immediately.
3. Universal MIDI Learn — Show MIDI LEARN
Press Show MIDI LEARN to display the Learn row above each ENC, FAD and BTN control. Hiding the Learn rows does not disable or delete their assignments.
Each Learn row contains:
| Control | Meaning |
|---|---|
L |
Start MIDI Learn for this slot. While waiting, it changes to W. |
R |
Reset only this MIDI assignment to the persistent disabled value -1. |
| Number | Learned CC number, Note number or Pitch Bend type. |
| Channel | Learned MIDI channel and input-port reference. |
| Mode | Detected encoder interpretation where applicable. |
Learning an encoder
-
Select
INTERNALwhen learning a standard MIDI controller. -
Press
Lfor the required ENC slot. - Move the encoder in both directions.
For a relative encoder, MIDI Learn waits until it detects both directions on the same CC, channel and port. The supported INTERNAL relative range is:
-
increase: values
1–20; -
decrease: values
107–127.
An absolute CC encoder is recognized when the movement reaches values inside 21–106. The detected mode is stored with the mapping, so a relative encoder is not treated as an absolute knob later.
Learning a fader
FAD Learn accepts:
- absolute MIDI CC;
- 14-bit Pitch Bend.
Learned absolute CC faders use the inverted direction required by the Renoise automation-graph orientation. Pitch Bend faders keep their native direction.
Learning a button
BTN Learn accepts CC and Note messages. It automatically distinguishes the common behaviors:
- a release received within one second is stored as momentary;
- no release within one second is stored as toggle;
-
an initial value
0is treated as a toggle-style message; - Note On/Note Off is stored as a Note button.
Reset and persistence
R disables the selected assignment without restoring an MCU default. The reset survives STOP ENGINE, a later START ENGINE and reopening the song. Press L to learn the slot again.
ENC/FAD/BTN mappings are stored with the song. Additional SETUP CONTROLL TOOL mappings and MIDI-port preferences are stored in the tool preferences.
4. INTERNAL and MCU Compatibility
MCU MIXER and INTERNAL are hardware-mapping banks. They are independent from target BANK 1–3.
MCU MIXER
MCU MIXER writes the prepared MCU-compatible layout into the MIXER hardware bank:
| Hardware control | Default MIDI assignment |
|---|---|
ENC1–8 |
CC 16–23, Channel 1, MCU relative interpretation |
FAD1–9 |
Pitch Bend, Channels 1–9 |
BTN1–8 |
Notes 16–23, Channel 1 |
| Cycle |
CC 86 |
| Rewind |
CC 91 |
| Fast Forward |
CC 92 |
| Stop |
CC 93 |
| Play |
CC 94 |
| Record |
CC 95 |
This profile is intended for the Panorama T4/T6 physical MIXER mode and controllers with the same MCU message layout. It also provides compatible Note LED feedback through P2 CTRL OUT.
Pressing MCU MIXER rewrites the MIXER hardware bank with these defaults. Use it deliberately if custom assignments already exist in that bank.
INTERNAL
INTERNAL activates the customizable standard-MIDI hardware bank. Its initial prepared assignments are:
| Hardware control | Initial INTERNAL assignment |
|---|---|
ENC1–8 |
CC 11–18, relative |
FAD1–9 |
Pitch Bend, Channels 1–9 |
BTN1–8 |
CC 21–28 |
| First six control buttons |
CC 29–34 |
These values are starting points, not a restriction. Universal MIDI Learn can replace them with messages from Arturia or another MIDI controller.
The last selected hardware bank is remembered. Switching between MCU MIXER and INTERNAL changes the active hardware interpretation; it does not erase the Renoise targets stored in BANK 1–3.
5. GUI 4 and GUI 8
The two GUI buttons select how many main hardware slots are visible and active.
| Mode | Visible and active controls |
|---|---|
GUI 4 |
ENC1–4, FAD1–4 and BTN1–4 |
GUI 8 |
ENC1–8, FAD1–8 and BTN1–8 |
FAD9 / the Master fader lane remains visible and active in both layouts.
GUI 4 is an operational mode, not only a visual resize. While it is active, slots 5–8:
- do not receive MIDI control messages;
- do not keep active Renoise parameter observables;
- do not send MCU button feedback;
- do not keep active W.A. communication with HYDRA SANITY;
- cancel a pending Learn or encoder-write event that belongs to a hidden slot.
Their learned MIDI messages, target assignments, BANK 1–3 data and stored W.A./LCK states remain in memory. Returning to GUI 8 reactivates the preserved configuration.
The selected GUI size is stored in preferences. Existing configurations default to GUI 8.
6. BANK 1–3
BANK 1, BANK 2 and BANK 3 are independent Renoise target profiles. Use < BANK and BANK > to move between them.
Each bank can preserve its own:
- Fader Mode and Encoder Mode;
-
Mixer and
FADER #DSP ONLYtarget selections; - Track DSP mapping;
- Instrument-slot mapping;
- Master 1–3 mappings;
- Buttons Mode and USER targets;
- W.A. and LCK states.
In Mixer Fader Mode, changing the bank also moves the fader track range by eight tracks. In custom target modes, each bank restores its explicitly stored track, device and parameter selections.
When changing banks, MCU MIDI COM safely detaches the outgoing HYDRA SANITY W.A. state, restores the next bank and then attaches the active targets from that bank. This prevents one bank from leaving a parallel automation owner behind.
Important distinction:
-
MCU MIXER / INTERNALselects the physical MIDI message map. -
BANK 1–3selects the Renoise target map.
The same learned hardware can therefore operate three completely different Renoise layouts.
7. Fader Modes
The Fader Mode menu contains Mixer, FADER #DSP ONLY and Clear Current.
Mixer
Mixer mode follows the active track bank. Each fader resolves the Renoise Mixer device on its assigned track.
- The default parameter is Volume.
- A different Mixer parameter can be selected for each fader.
- The selected parameter name is remembered per bank and slot.
- BTN1–8 follow the FAD1–8 track assignments in USER, MUTE and SOLO modes.
FADER #DSP ONLY
This mode lets every fader select its own:
- Renoise track;
- DSP device;
- automatable parameter.
Only DSP devices or Send devices whose displayed name begins with # are listed. Rename a Renoise DSP, for example, to #Filter or #Delay to expose it to this mode.
The target list refreshes automatically when an assigned track receives these changes:
- a DSP is inserted or removed;
- DSP order changes;
-
a DSP is renamed with or without the
#prefix; -
an existing
#DSPname changes.
A valid selected device and parameter are preserved by their actual Renoise object identity. If the selected target is deleted or loses the # prefix, Device and Parameter safely return to --.
Tracks without an eligible #DSP also show --; an assigned instrument is not required for FADER targets.
Clear Current
Clear Current clears only the currently active fader-mode mapping. It does not reset MIDI Learn or the other target banks.
8. Encoder Modes
The Encoder Mode menu contains Track DSP, Instrument, Master 1, Master 2, Master 3 and Clear Current.
Every encoder page also provides:
| Control | Function |
|---|---|
W.A. |
Publish the encoder target and live movement to HYDRA SANITY for automation writing. |
LCK |
Keep the corresponding Panorama row locked in HYDRA SANITY. Enabling LCK also enables W.A.; disabling LCK leaves W.A. active. |
Without W.A., the encoder still changes its resolved Renoise parameter directly. W.A. is specifically the automation-writing bridge to HYDRA SANITY.
Track DSP
All ENC slots operate on the current Renoise track. Each ENC slot can select its own DSP and parameter from that track.
When the selected track changes in Renoise, MCU MIDI COM automatically:
- detects the selected-track change;
- loads the new track’s current DSP chain;
- rebuilds all ENC Device and Parameter lists;
- reapplies the active-bank ENC mapping to the new track;
- restores the stored W.A./LCK state for that track where available;
- publishes the new target identity to HYDRA SANITY.
This means the encoder page follows Renoise track navigation without requiring a manual page switch. If the new track does not contain a compatible device or parameter at the stored selection, that target safely becomes --.
The Track selector in the page header also changes the selected Renoise track, so the same automatic remapping path is used.
Instrument
All ENC slots control one selected Renoise instrument.
- Select the instrument in Renoise or with the Instrument popup.
-
Press
LOAD Host Automation. - MCU MIDI COM loads the instrument plugin’s automatable parameters.
- The first available parameters are assigned to ENC1–8 and can then be changed individually.
Instrument mappings are cached per selected instrument and restored automatically when the Renoise instrument selection changes.
For HYDRA SANITY W.A. operation, the current track must contain the corresponding *Instr. Automation target. When several identical matches exist, select the intended automation device in Renoise first.
Master 1, Master 2, Master 3
These are three independent eight-encoder mapping pages. They are not limited to the Renoise Master track.
Each encoder can select any:
- track;
- DSP device;
- parameter.
The FOLLOW button on one encoder slot makes that slot follow the selected Renoise track. Changing tracks then rebuilds that slot for the new track while preserving its per-track target cache where possible. Only one FOLLOW slot is active on a Master page at a time.
Clear Current
Clear Current clears only the currently active Encoder Mode page in the current bank. Other Encoder Modes, MIDI Learn assignments and other banks remain unchanged.
9. Buttons Modes
BTN1–8 use one shared Buttons Mode. Choose USER, MUTE, SOLO or ARM in the Buttons Page.
| Mode | BTN1–8 behavior |
|---|---|
USER |
Each button controls a selected parameter on the corresponding FAD1–8 target track. Device and Parameter popups are available in this mode. |
MUTE |
Each button controls the mute/active state of the corresponding FAD1–8 target track. |
SOLO |
Each button controls Solo on the corresponding FAD1–8 target track. |
ARM |
B1–8 control ENC1–8 / PANORAMA_E1–8 in HYDRA SANITY instead of following the fader tracks. |
The selected Buttons Mode and USER targets are stored per target bank.
Compatible MCU Note LED feedback follows the current button state through P2 CTRL OUT. In ARM mode, the hardware button activates the corresponding HYDRA SANITY Panorama row action.
The separate F9 hardware button is local to the fader section and is not part of the four B1–8 Buttons Modes.
10. SETUP CONTROLL TOOL
SETUP CONTROLL TOOL extends the main ENC/FAD/BTN layout with additional learned hardware buttons. It was designed around the dedicated control buttons available on the Panorama T4/T6, while the Learn mechanism can also accept CC or Note buttons from another controller connected through P2 CTRL.
The dialog contains prepared positions for:
-
TRACK -,TRACK +,BROWSE,VIEW; -
BANK -,BANK +,ZOOM -,ZOOM +; - Repeat, Rewind, Fast Forward, Stop, Play and Record.
Press a displayed control button to start Learn for that position. It changes to PRESS B; then press the required physical hardware button. The learned MIDI type, number and channel are shown below it.
Clear All MIDI Learn in this dialog clears only the additional SETUP CONTROLL TOOL assignments and their HS routing states. It does not clear the main ENC/FAD/BTN assignments.
Current actions
-
BANK -andBANK +switch MCU MIDI COMBANK 1–3locally. -
Transport-row positions can be switched to
HSrouting individually. -
With
HSenabled, Repeat sends the HYDRA SANITYDEL TRACK NOTE / GO TO ROW 00command. -
With
HSenabled, Stop controls HYDRA SANITY Safe Play. -
With
HSenabled, Play controls HYDRA SANITYREC Automation. -
With
HSenabled, Record controls HYDRA SANITYREC Note & Automation. - Rewind and Fast Forward HS positions are currently reserved.
- Track, Browse, View and Zoom positions currently provide learned button/state detection and remain prepared for further local actions.
SETUP CONTROLL TOOL mappings are stored in preferences, so the physical Panorama T4/T6 control buttons can remain available across songs while the main target maps remain song-specific.
11. MCU MIDI COM and HYDRA SANITY
MCU MIDI COM and HYDRA SANITY have separate responsibilities:
| Tool | Responsibility |
|---|---|
| MCU MIDI COM | Owns the MIDI hardware ports, MIDI Learn, hardware mode, target selection, direct parameter control and MCU LED feedback. |
| HYDRA SANITY | Owns automation-graph writing, Panorama rows, ARM/STICKY behavior, graph continuity and protected recording workflows. |
The real power of MCU MIDI COM comes alive when it is used together with HYDRA SANITY. MCU MIDI COM provides the hardware-control and target-mapping layer, while HYDRA SANITY extends this workflow with automation-graph writing and protected recording control.
Together, the tools allow movements from ENC1–8 to be written directly into the Renoise automation graph. FAD1–9 remain available as direct controls for static song parameters, including Mixer parameters and explicitly exposed #DSP parameters.
The two tools exchange runtime data over a local OSC connection.
Encoder W.A. workflow
- Select an ENC target in Track DSP, Instrument or Master mode.
-
Enable
W.A.for that encoder. - MCU MIDI COM publishes the track, DSP, parameter and encoder-slot identity.
-
HYDRA SANITY creates or updates the corresponding
PANORAMA_E1–8row. - Encoder movement is tracked locally by MCU MIDI COM and the resulting WRITE state is published to the HYDRA SANITY automation writer.
- Relative encoder startup can synchronize with the current graph value before applying movement.
LCK keeps the Panorama target protected in HYDRA SANITY and forces W.A. on. ARM Buttons Mode sends the matching encoder-row ARM action.
Changing a target, bank, Renoise track or GUI 4/8 layout publishes the corresponding state transition so HYDRA SANITY does not keep an obsolete target active.
REL encoder write handling
When W.A. is active, every valid physical REL encoder movement contributes to the MCU encoder state and updates the resolved Renoise parameter.
During PLAY, MCU MIDI COM limits only the number of immediate OSC WRITE messages sent to HYDRA SANITY. Up to three WRITE messages can be published per Renoise row.
If additional REL movements arrive inside the same row, they are not discarded. MCU MIDI COM continues to update the encoder state and coalesces the remaining movement. The latest absolute encoder value is then delivered to HYDRA SANITY at the next valid publish opportunity.
This keeps fast encoder movement responsive while preventing unnecessary OSC WRITE bursts.
The automation-graph density itself remains controlled by HYDRA SANITY.
The hardware controller should normally be assigned to MCU MIDI COM P2 CTRL. HYDRA SANITY receives the resulting Panorama control data through OSC; it does not need to open the same Panorama control port a second time. HYDRA SANITY can still use its own MIDI MAPPER for other controllers and global functions.
Both tools must be running for W.A., LCK, ARM and HS-routed SETUP CONTROLL TOOL commands to work.
12. Persistence Summary
| Data | Storage and lifecycle |
|---|---|
| ENC/FAD/BTN MIDI Learn | Saved automatically with the Renoise song. |
| BANK 1–3 targets and modes | Saved automatically with the Renoise song. |
| W.A./LCK and Buttons states | Saved with the corresponding target bank. |
| MIDI device names | Stored in tool preferences. |
| GUI 4/8 and MIDI panel visibility | Stored in tool preferences. |
| SETUP CONTROLL TOOL Learn and HS routing | Stored in tool preferences. |
| Final save |
Performed silently by STOP ENGINE. |
| New song | Stops the engine, closes the GUI and clears song-scoped mappings before the next explicit start. |
See MCU_MIDI_COM_CHANGELOG.md for release changes.
13. Development Status and Hardware Scope
MCU MIDI COM is still under active development.
The tool was originally created for the Nektar Panorama T4 and T6, including their multiple MIDI endpoints, MCU control layout and additional hardware buttons. Universal MIDI Learn now makes it possible to use other MIDI hardware as well, including Arturia and other controllers that send supported CC, Note or Pitch Bend messages.
Hardware compatibility has two levels:
-
MCU MIXERis the prepared profile for the Panorama-compatible MCU message layout. -
INTERNALis the recommended path for other controllers and custom MIDI presets.
Different controllers can use different relative-encoder formats, button release values and feedback protocols. MIDI input can usually be learned, but MCU LED feedback is only available when the device accepts the feedback format sent by the active profile.
Current development limitations include the reserved SETUP CONTROLL TOOL actions described above. Test a new controller setup on a copy of the song before relying on it in a live performance.
When reporting a problem, include:
- MCU MIDI COM version;
- Renoise version and operating system;
- exact MIDI hardware model and hardware mode;
-
selected
P2 CTRLinput/output; -
MCU MIXERorINTERNAL; -
GUI 4orGUI 8; - target BANK, Fader Mode, Encoder Mode and Buttons Mode;
- the exact action sequence and observed result.
14. Current Release Highlights — v0.87
- Improved fast REL encoder response during PLAY REC / HYDRA WRITE IN.
- Every valid physical REL encoder movement now contributes to the authoritative MCU encoder state.
- The previous limit of three physical REL inputs per Renoise row has been replaced by a limit of three immediate OSC WRITE publications per row.
- Additional same-row REL movement is coalesced instead of discarded, preserving the latest absolute encoder value.
- Fast encoder movement therefore remains consistent across different BPM and LPB settings without removing the existing OSC write-rate protection.
- W.A., LCK, SGA acquisition, target remapping and the OSC WRITE packet contract remain unchanged.
- HYDRA SANITY continues to control automation-graph density independently from the MCU MIDI input rate.
Why use MCU MIDI COM with HYDRA SANITY?
MCU MIDI COM becomes significantly more powerful when paired with HYDRA SANITY:
- ENC1–8 can control mapped Renoise parameters while their movements are written into the automation graph by HYDRA SANITY.
-
Changing the Renoise track in
Track DSPmode automatically remaps the encoder targets to the selected track. - FAD1–9 can remain direct controls for static song parameters without requiring automation writing.
-
Mixermode provides direct mixer control, whileFADER #DSP ONLYexposes DSP parameters whose device name begins with#. - W.A., LCK and ARM integrate the MCU control surface with HYDRA SANITY’s automation workflow.
This combination turns a standard MCU or MIDI controller into a flexible hardware control surface for both direct parameter control and automation recording in Renoise.